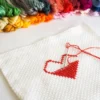
Cross stitch is making a comeback among modern makers and crafters. Learning how to cross stitch is easy, and these instructions for beginners will get you stitching in no time!
INSTRUCTIONS FOR CROSS-STITCH
1. Always begin stitching from the Centre of your design and work outwards.
2. First find the Centre of your fabric by folding it in half lengthwise and crosswise. Mark the Centre point where the two fold lines meet with a pin. The arrows on your chart correspond to the fold lines on your fabric.
3. Now find the Centre square at the Centre of your Chart. The position of the Centre square corresponds to the position of your pin. Begin stitching from the Centre point.
4. When you look closely at your fabric you can see it is made up of small squares. Each square on your Fabric represents a Square on your Chart. You will stitch one cross stitch over each square on your fabric. The different Symbols show you the correct colour to use in each square.
5. To begin stitching, first thread your needle with 2 (or sometimes 3) strands of cotton.
6. When making your first few stitches remember to leave a 2 cm ‘tail’ at the back of your work. Hold this ‘tail’ so that your first few stitches are worked over it. This secures your thread evenly. Never tie a knot in your thread. Follow the Cross Stitch Instructions.
7. Cross stitch is worked in rows of even, slanted stitches, usually from left to right laying down half the crosses, then back from right to left to complete them. Note the top stitch must always be slanted the same way. When stitching try to keep the tension of your thread even and do not pull too tight. It is often easier to sew your design using an embroidery hoop to hold the material.
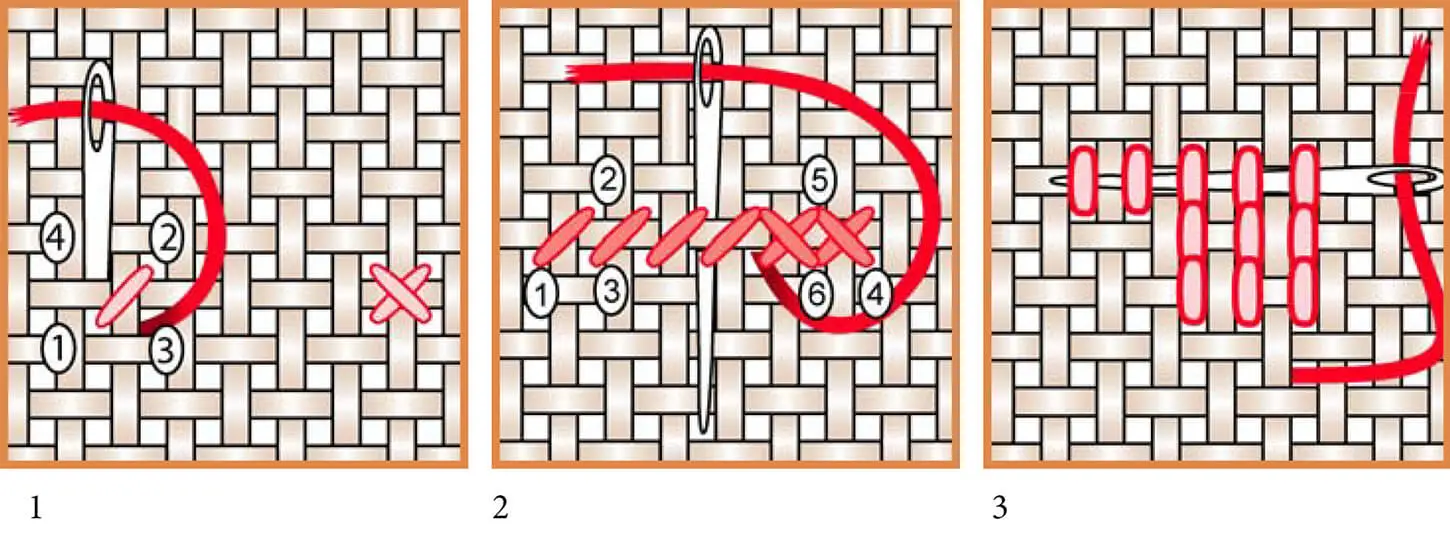
1. CROSS STITCH – INDIVIDUAL
An individual cross stitch is worked in the same sequence as a row of cross stitch. Bring the needle out at 1 and insert at 2, completing half the cross stitch. Then, bring it out at 3, directly below 2 and insert the needle at 4, above 1. Your individual cross stitch is complete.
2. CROSS STITCH – ROW
Bring the needle out at 1, insert at 2 and out again at 3. Continue this process until the desired number of stitches is completed for that row. At the end of the row, work back, bringing the needle out at 4, inserting at 5 and out again at 6.
3. FINISHING OFF
To finish off your thread run the needle through the back of four or five stitches and trim the thread close to the cloth.
Should work become soiled, handwash in cold water with mild soap. Rinse well and dry flat in shade. Do not wring. Press from the back with a warm iron.
INSTRUCTIONS FOR BACK STITCH
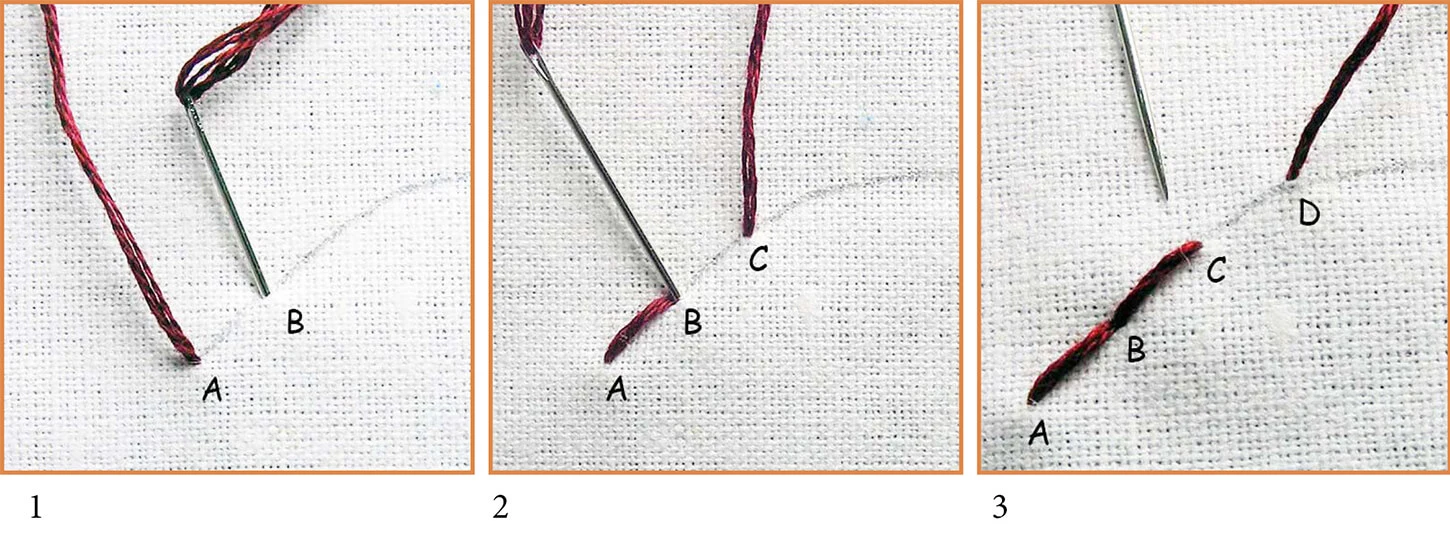
1. Bring the thread through A and take it in through B. This creates one stitch.
2. Bring the thread through C and take it in through B. This way, we are creating a stich by taking the thread backward.
3. Bring the thread through D and take it in through C. Continue this pattern to finish the design.
INSTRUCTIONS FOR FRENCH KNOT
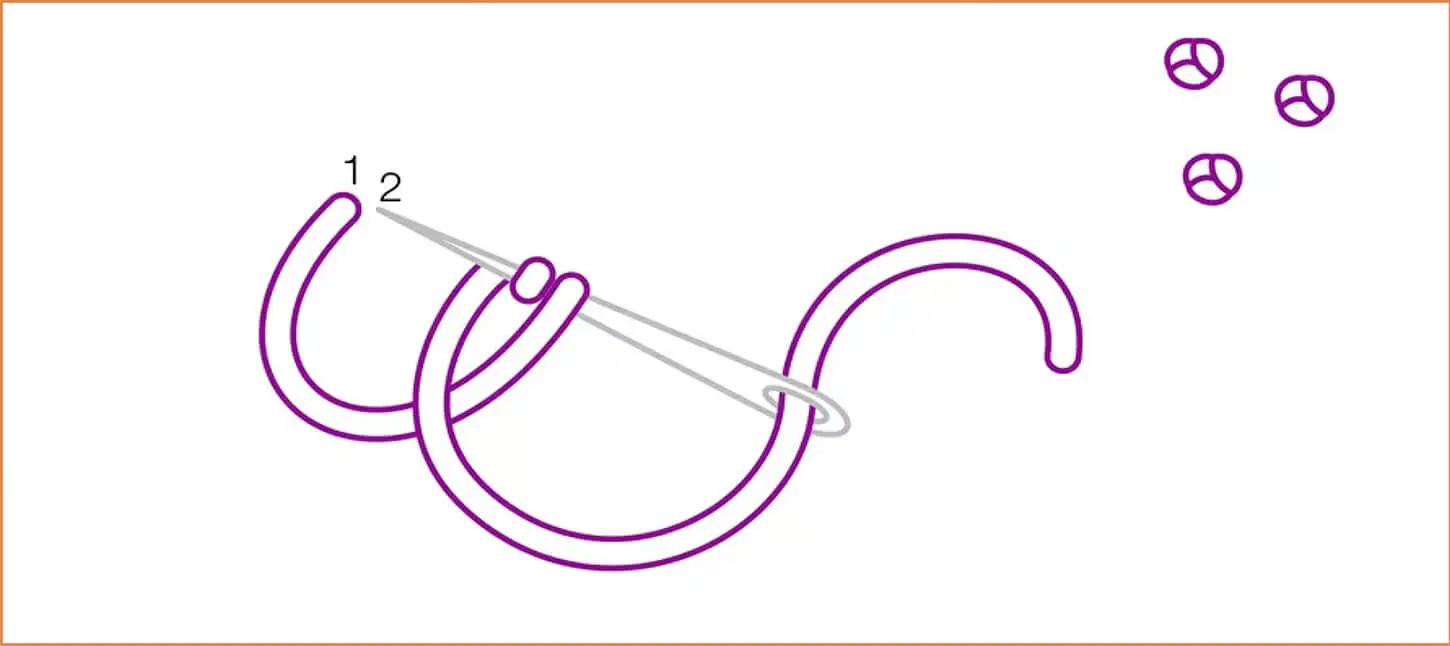
To make a French knot, bring your needle up through the fabric where you want the knot to place the knot (1). Wrap the thread around the fabric once for a small knot or twice for a larger knot. Avoid wrapping more than twice or you will end up with a lopsided knot.
To finish the knot, insert the needle back into the fabric close to the hole you came out of (almost in the same hole) (2). Slowly pull the needle and working thread through the wrapped loops to complete a French knot.
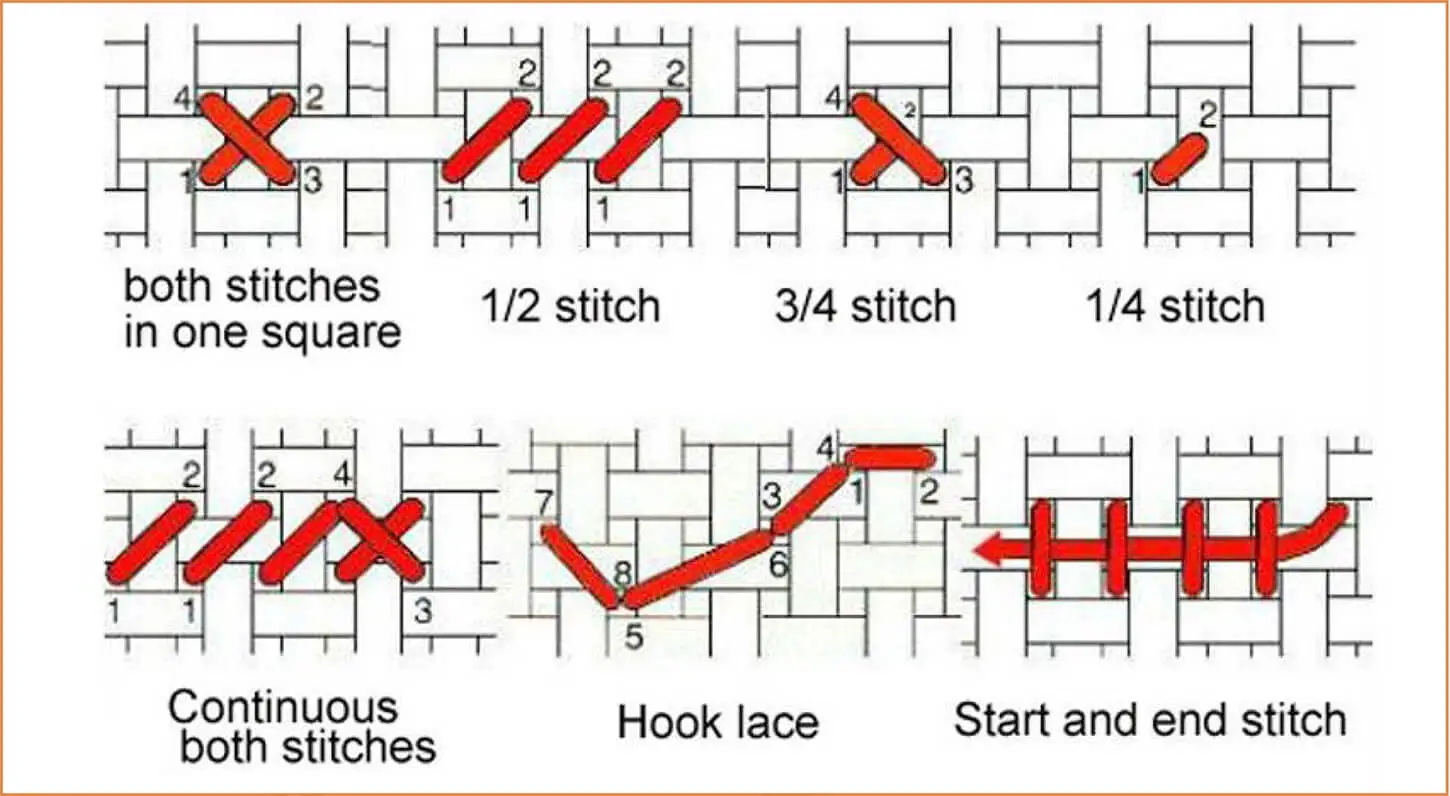
INSTRUCTIONS FOR 3/4 STITCH
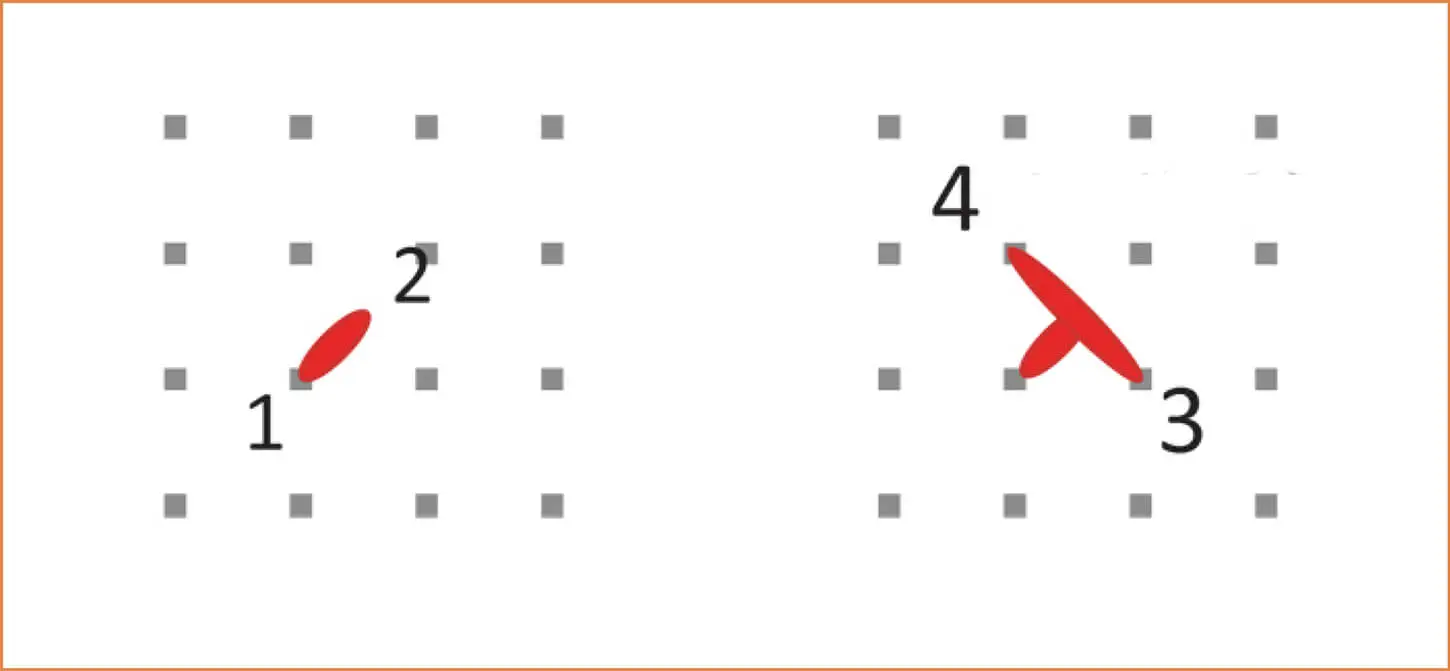
Make a tiny diagonal stitch (1/2 of a normal half stitch) from the corner of the square to the center of the square (step 1-2). Then make a normal diagonal between the other two corners (step 3-4).
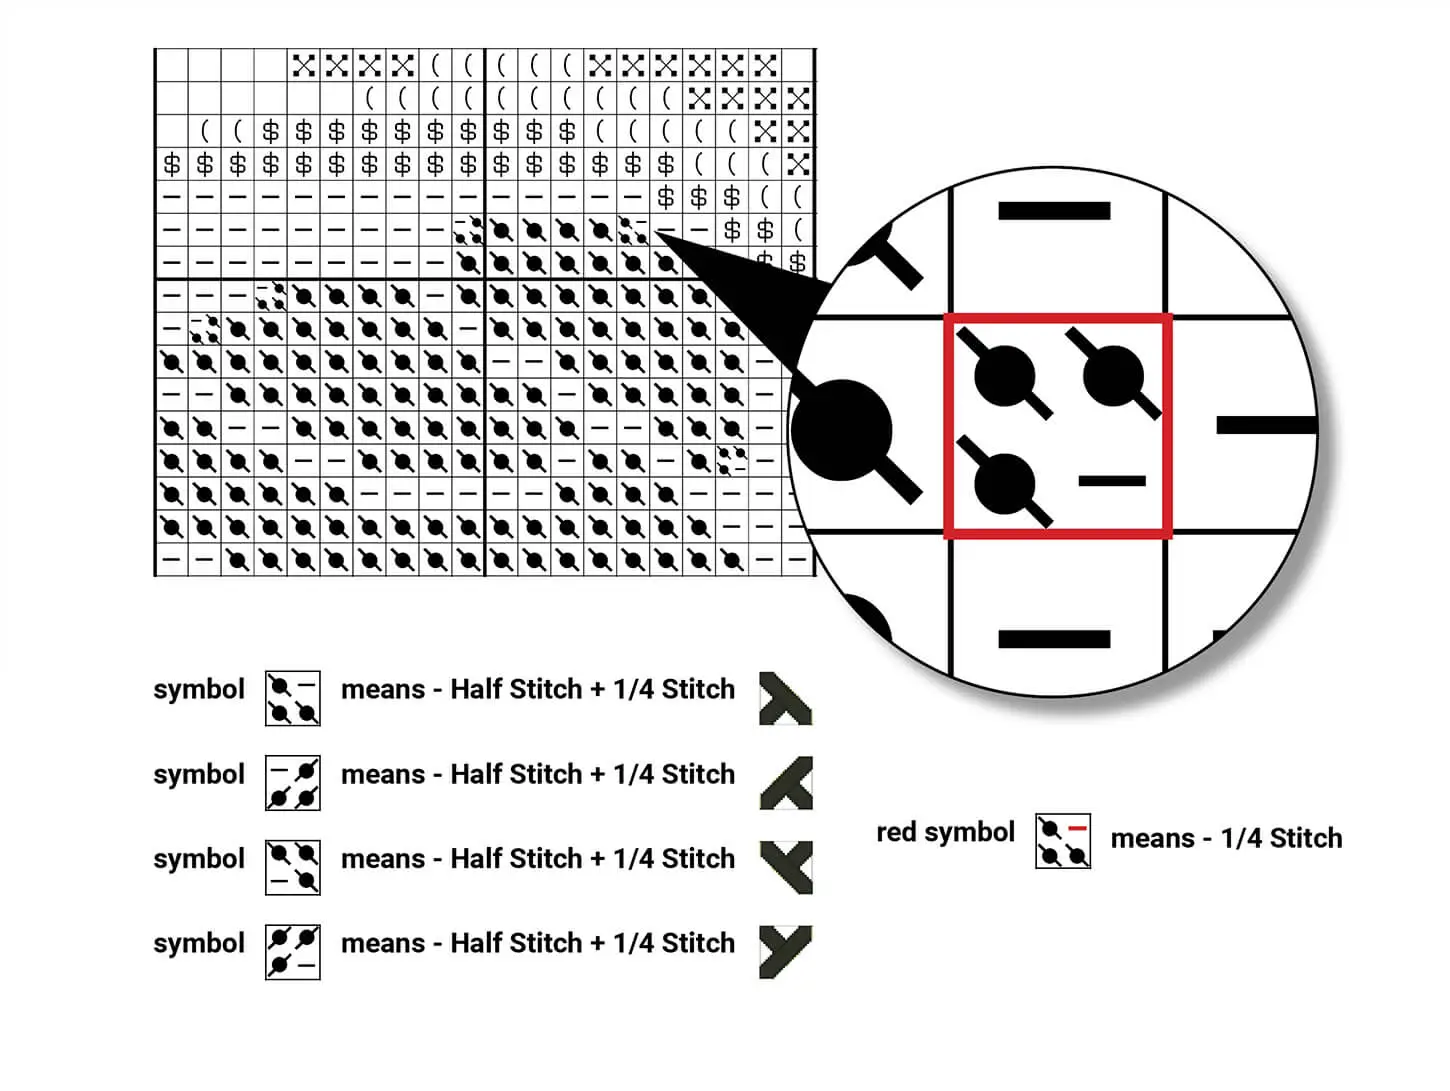
SYMBOLS FOR THREE-QUARTER STITCHES
CROSS STITCH METHOD AND TECHNIQUE
Tips & tricks
You will quickly get comfortable making basic cross stitches. Here are a few additional tips to keep in mind.
- Aim for a nice easy tension on your stitches. Don’t pull them so tight that they warp the fabric or leave them so loose that they gap. The stitches should lie flat against the fabric without pulling against it.
- Don’t make long jumps across the back of your fabric with the thread because they might show through on the front. When moving to a new area that is more than a few stitches away, you should end your thread and then begin it again in the new spot.
- Buy all your supplies for a project at the start. Thread comes in dye lots that may vary slightly between batches.
- As you stitch, the thread will tend to get twisted. Every once in a while, let your needle and thread hang freely to let it unwind.
- Have fun! Cross stitch is a relaxing and rewarding craft. Don’t stress too much about the details and enjoy the process!